Monday, November 4, 2013

Soil Dry Percolation Rate

We cut off the top of the three water bottles. We used the part that we cut off as the funnel for this experiment. We then placed a small piece of filter paper into the neck of the water bottle. We then filled the three water bottle tops with our soil, sand and clay leaving 1 cm room on the top. The cross sectional area of the funnel for all three water bottles is 33.16625 centimeters squared. We then added water to each sample and recorded the elapsed time from when the water hits the surface to the time a measurable amount of water collected on the bottom of the bottle. We then collected the water volume for each material. The soil's water volume was 71.8mL and the elapsed time was 26.5 seconds. The sand's water volume was 52.9 mL and the elapsed time was 33.2 seconds. The clay's water volume was 63.5 mL and the elapsed time was 29.0 seconds. Soil has the fastest percolation rate. Soils with smaller clasts also have greater water holding capacity. Clay had the second fastest percolation rate. Clay will have a more rapid high peak response to water than sand. Sand will have an attenuated response. Sand has a greater grain diameter which will make the water take longer to filter through because it will have a greater frictional resistance. Since we determined earlier that our soil is mostly clay, this is why our dirt had the fastest percolation rate.


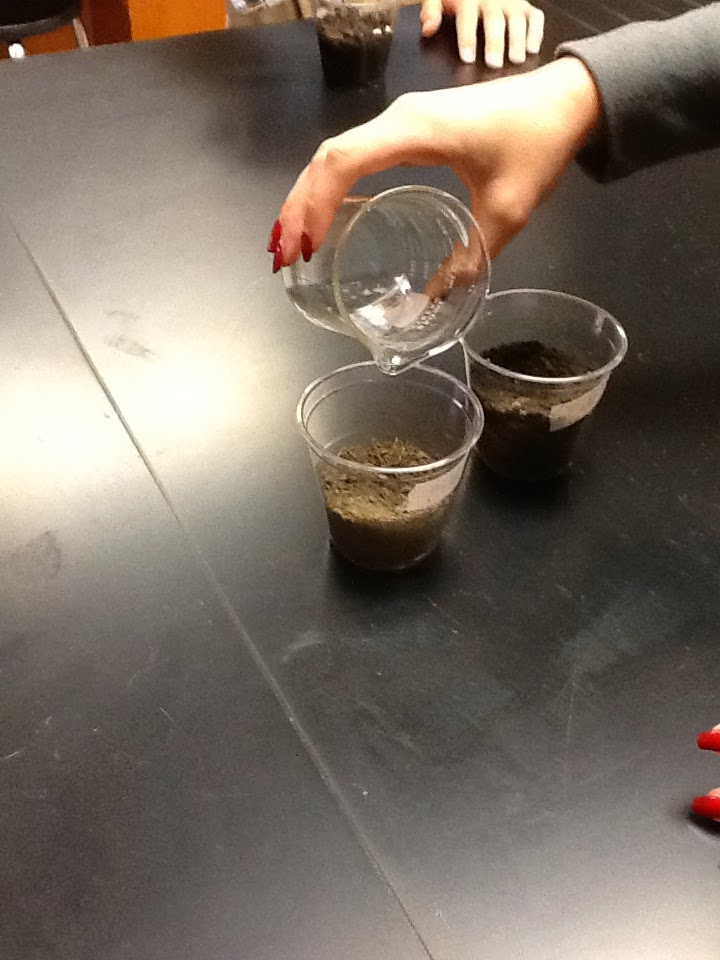
All three materials after we added water. 

The clay when it had water poured into it

Add caption

The sand when we added water

The dirt as we added water to it

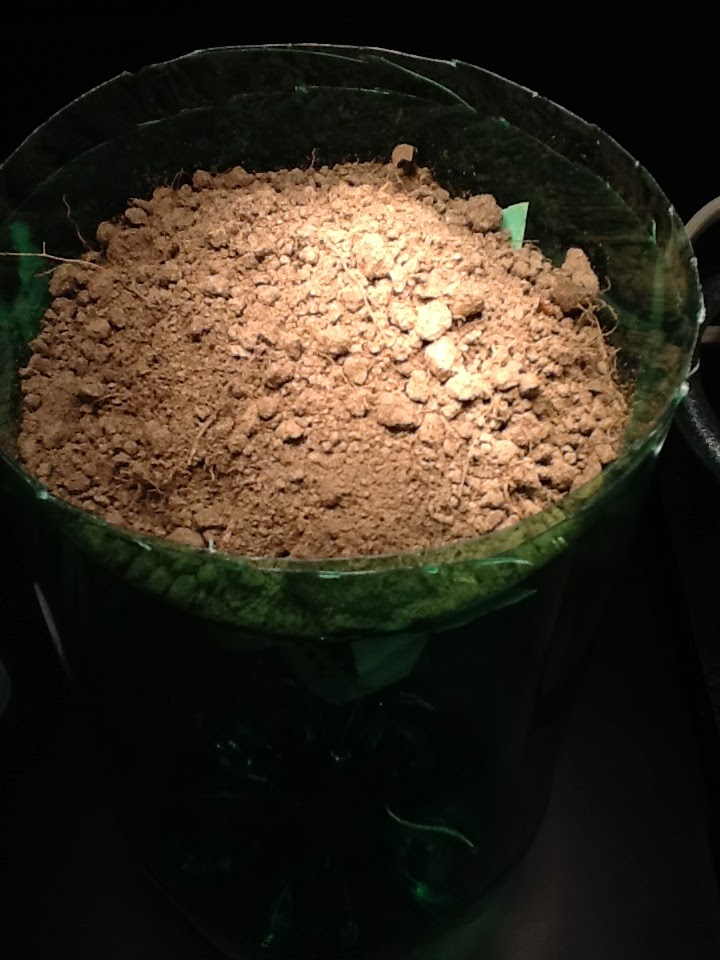
The dirt before we added any water 

Soil Fertility Analysis (pH, Nitrogen, Phosphorous, Potassium Tests)

We did the pH test by filling the test tube with the pH indicator and adding 3 of 0.5g spoonfuls of our soil. We then mixed the test tube for a minute and allowed to sit for 10 minutes. This led us to be able to calculate the pH of our soil by matching the color with the pH Color Chart. Our soil's pH was 7.5.
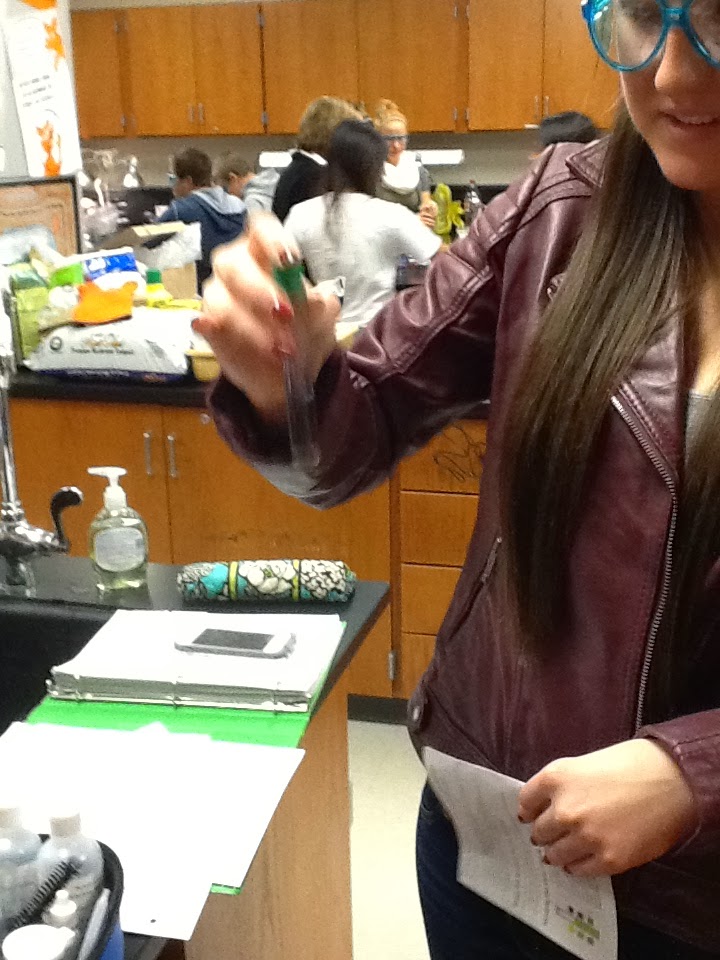
Rachel shaking the pH indicator and soil together


The new solution looks like its inbetween the 7 and 8 making the pH 7.5

For the phosphorous test we filled the test tube with the phosphorus extracting solution. We then added 3 spoonfuls of 0.5g of soil. We capped and mixed gently for one minute. Then we uncapped the test tube and waited for the liquid above the soil to become clear. Then we used a pipet to transfer the clear liquid into a clean test tube. When the clear liquid was in a clean test tube we added 6 drops of Phosphorous Indicator Reagent and capped and then mixed. We then added one Phosphorous Test Tablet and mixed until it dissolves. We matched the color with the Phosphorous Color Chart to get a trace of phosphorous in our soil.
The Phosphorous Test Tablet being shaken so it will dissolve

The Phosphorous shows there is a trace of phosphorous in our soil. 
For the Nitrogen Test we filled the test tube with Nitrogen Extracting Solution and put in two measures of 0.5g of our soil. We capped and mixed for one minute. We removed the cap and allowed the soil to settle. We used a clean pipet to transfer the clear liquid to a new and clean test tube. We used the 0.25g spoon to add two measures of Nitrogen Indicator Powder to the clear liquid and mixed it. We waited five minutes and were able to use the Nitrogen Color Chart to see that our soil had a trace of nitrogen.
The solution when we had to wait five minutes for the pink color to develop

As you can see our soil only has a trace of Nitrogen

For the Potassium Test we filled the test tube with Potassium Extracting Solution. We added 4 0.5g spoonfuls of our soil. We capped and shook the test tube vigourously for a minute and then we allowed the soil to settle. We used a pipet to transfer the clear liquid to a different test tube. We added one Potassium Indicator Tablet to the clear liquid and mixed until the tablet dissolves. We then added the Potassium Test Solution with two drops at a time. Using the Potasium End Point Color Chart we saw that our soil's potassium need 14 drops so it was medium, which means the potassium level is 120-200 lbs/acre.


Based on these results we need to lower our pH a bit. Since ours was 7.5 it should be between 5.5 and 7.0. We are low on nitrogen and phosphorous. We have a trace of both nitrogen and phosphorous and we need them to be at least medium. The ideal pH range would be 5.5 to 7.0 but the plants around this soil must have had 7.5. Some of the plants around this dirt looked fairly healthy while others did look like they were going to die. As you can see the plants looking like they were going to die were apart of this soil because it doesn't have enough of the nutrients to support plant life. 

Berlese Funnel

We used 2-liter bottle and cut off the top, which will become the funnel section. We poured 20-25 mL of ethanol into the bottom part of the bottle and we placed the funnel section on top. We placed the wire mesh in the neck of the funnel so no soil will get into the ethanol. We put the bottle in a warm and quiet place under the heating lamps. The heating lamp should help drive the organisms to the bottom of the funnel.
The bottle with the funnel with the wire mesh in the neck tapped to the bottle. It's ready to identify organisms

The bottle under the heated lamp

A close up of the bottle under the lamp.

 In our petri dish, we didn't have any organisms. Therefore, we were unable to identify any.
No organisms in our petri dish

Looking to see if there are any organisms in our petri dish.


If we did have organisms they would make the soil healthier. Soil is a mixture of broken rocks and minerals, living organisms and decaying organic matter (humus). The materials that these organisms use to survive form the soil ecosystem. They maintain fertility, structure, drainage and aeration of soil. They also break down plant and animal tissues, by doing this they releases stored nutrients and convert them into forms usable by plants. From the people I talked to in the class they couldn't find any organisms. This might show that Illinois at least Lake Zurich soil isn't very fertile.


Salinization


     This experiment showed the effects of salt levels in soil. Six bags were gathered and 5 seeds were placed in each bag. The seeds were placed on a paper towel to help absorb the water solutions and help the seeds grow. Each lab table made a water solution using 120mL of water and the given original table salt (NaCl) amount (0g, 0.5g, 1g, 2g, 3g, 4g, and 5g), but these salt amounts were changed because they were only correct in 100mL of water so each table had to convert their salt amount to add the correct amount for a 120mL solution by using the original amount/ 100mL times Xg/ 120mL. The added amounts of salts to the 120mL waters were, 0g, 0.6g, 1.2g, 2.4g, 3.6g, 4.8g, and 6g. Each solution was mixed thoroughly and then 20mL of the solution was poured into each bag and then one bag was given to each lab table so that each table would end up with a bag of each salt concentration. The bags were zipped shut and were left alone for about a week.
This is the 0g concentration after a week, which showed the most growth

0.5g concentration after a week

1g concentration after a week

2g concentration after a week

3g concentration after a week

4g concentration after a week


5g concentration after a week
     The control had the most growth, while the oner solutions had no growth visible. This means that the more salt in the soil, the less growth the plant will have. All areas that have irrigation will experience this soil salinization problem and may have less grown plants because the salt is getting into the soils.
     Overly salted soils can be remediated by amending the salty soil with sulfur, lime, or calcium because they will help remove/replace the sodium in the soil. Soil tests must be ran to find out how much sulfur, lime, or calcium to add.


Remediation

First we had to measure out soil in two cups and make sure there was the same amount, which was 56.9g. One was to be a control and the other one will be put remediated. Our original soil lacked many different things that would make our soil the best it could be. Since our soil had a pH of 7.5 we put in some acidifier to lower it. We put in a teaspoon of acidifier. Even though we had a fairly good amount of organic material, we thought that it needed more along with phosphorous and nitrogen. The problem with this is we don't know how much of phosphorous and nitrogen we are adding. Since our potassium was good this could be a problem, but we added a spoonful of moo-nure anyway. Our soil was all clay so we added two spoonfuls of sand. We then added two spoons of potting soil in place of some silt and it also contains more sand and fertilizer and compost. Potting soil will help the soil be ready to grow things. We expect this soil to be much better than the original one since we added things that our soil lacked. The results of the soil texture test quantitative test led to the results of the soil dry percolation rate. Since our soil was mostly clay it showed that they would have similar percolation rates because of this. Obviously not the exact same because our soil had other elements in it too but very similar. Also, the soil moisture and percent organic matter are related because in the soil moisture you were looking for how much water is in your soil. Organic matter includes water because it will store water in the soil.  Therefore these two experiments are similar too.
Adding the Moo-nure for the organic matter

Adding more sand since our soil was mostly clay

Mixing everything together so we can add the seeds!

Controlled experiment


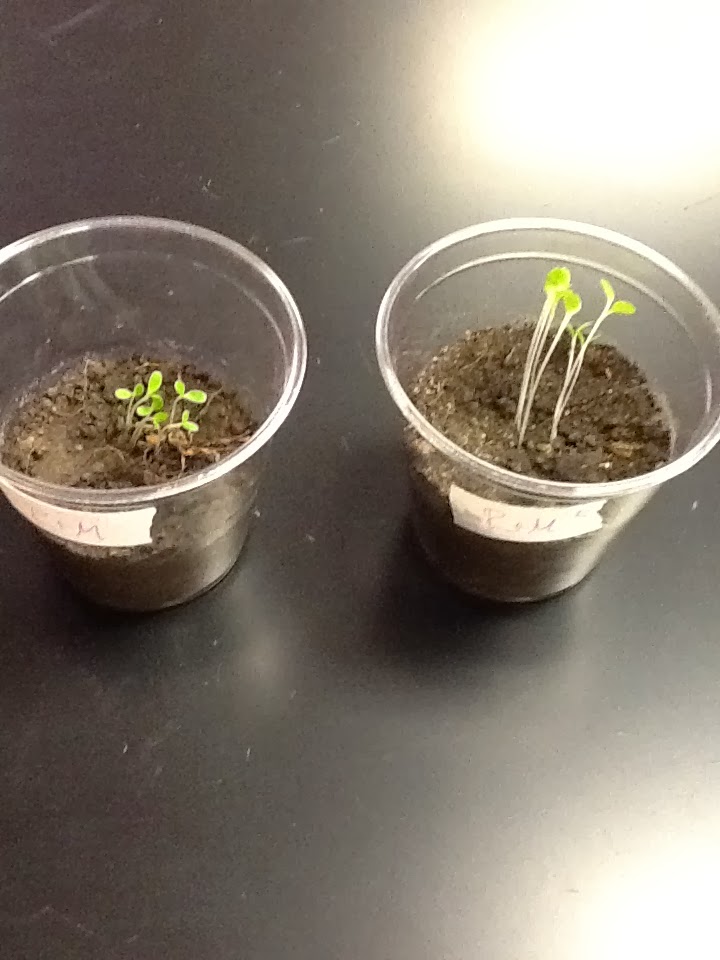
Now that we finished our remediation of our soil we got to put lettuce seeds in the control and our remediated soil. We put 6 lettuce seeds in each soil cup. The growth rate of our remediated soil was a lot more faster than our original soil. Our remediated soil's lettuce leaves were more full and there were three of the leaves compared to the originals soil which had one to two leaves and the leaves were more oval like. The survival rate was good in both but the original only grew five lettuce seeds instead of the six that we put in. Because our lettuce would have needed more time we could not have done the taste test. Although if we did our remediated soil's lettuce would have tasted better than our original. The remediated soil's lettuce looked more appetizing than the other based on its characteristics. If we did eat other group's soil it would've varied depending on where they originally got their soil and if they put in the right amounts of the fertilizer, acidifier, etc into their soil. We also added water to our soil. The first day we did it we added 14.8mL of water to each soil. The next time we added 25 to each and the last time we added 48.9 to the soil.
The seeds before we put them in

Adding 14.8 g of water to the soil right after we put in the seeds. 

As you can see the remediated soil grew the lettuce fairly quickly


Again you can see how quickly the remediated soil is growing compared to the controlled soil

Our final lettuce. The remediated soil is taller and bigger
The controlled soil at the end of the experiment. You can see the leaves not as full as the remediated

The remediated soil,which was taller and the leaves were fuller than the controlled soil. 

Rachel's conclusion

At the beginning of this experiment I thought that this would be useless and kind of stupid. Who cares about soil, right? I found out that I was wrong. The right soil means everything! If you don't have the right pH, organic matter, nitrogen, phosphorous, potassium, clay, sand or silt then the soil can be useless. I realized that there is a difference between dirt and soil. Dirt was the brown stuff I got on me after a well played soccer game, but soil was not dead it was alive and we needed excellent soil to be able to grow food. Soil supports the most diverse ecosystem on the planet. I learned that not all soil is the same. It is different depending on each area and the weather. In arizona the dirt is red and not good for farming but in the mid-west has the best soil for growing a large range of agriculture.  I learned that for most agriculture you have to perfect and help the soil with what it is lacking before you can grow different foods. Others should learn that soil is very important and be aware of everything soil is composed of. This experiment made me learn that I should care a lot more about all the different types of soil because all around us can be soil composed of all different things. I also learned that soil is very different than dirt and I will never make that mistake again!